Tags: Visual edit apiedit |
Tags: Visual edit apiedit |
||
| Line 41: | Line 41: | ||
Azazel should never be used offensively (without DS), but he is quick on creep. He should always be placed slightly in front of your tanks with the Golems standing above him to prevent him from being easily spotted and focus fired on. Azazel's high line splash damage will chew ragged holes through Heaven's ranks if they attempt to dislodge the tanks from their position. One can also hide Aza directly under the tanks themselves, though his efficacy in a dive will be slightly diminished for ranged reasons because of this. Notably, he cannot be sieged with Sammy's infernal siege ability. |
Azazel should never be used offensively (without DS), but he is quick on creep. He should always be placed slightly in front of your tanks with the Golems standing above him to prevent him from being easily spotted and focus fired on. Azazel's high line splash damage will chew ragged holes through Heaven's ranks if they attempt to dislodge the tanks from their position. One can also hide Aza directly under the tanks themselves, though his efficacy in a dive will be slightly diminished for ranged reasons because of this. Notably, he cannot be sieged with Sammy's infernal siege ability. |
||
| − | === Moving Forward === |
+ | ==== Moving Forward ==== |
When moving the set up forward, you can observe the following steps: |
When moving the set up forward, you can observe the following steps: |
||
# Make sure the area you are moving to has vision/detection with Ovies and is Creeped. |
# Make sure the area you are moving to has vision/detection with Ovies and is Creeped. |
||
Revision as of 18:15, 24 March 2017
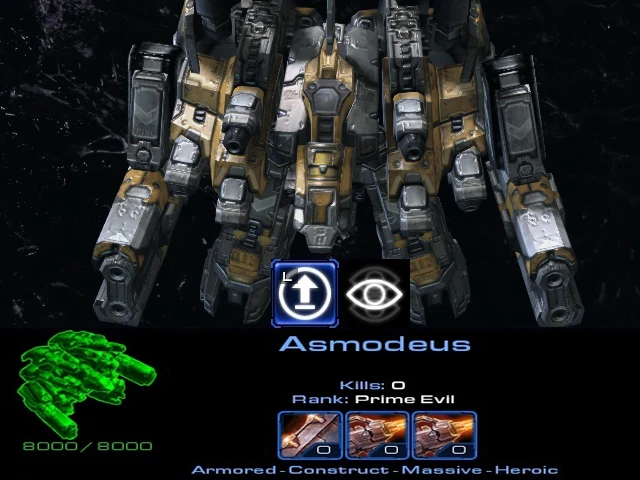
Asmodeus (Odin) is one of the most UNFORGIVING of roles to play, so if you're new, turn back now. As Asmodeus, you possess the longest range army Hell has to offer which can be further increased with the use of Samayazza (High Templar). You will, however, be the least mobile of all of Hell's forces so creep spread is especially important. The most common and successful way to gain ground will be moving up your tank line, hereafter referred to as the "set up." A "micro position" is the exact spot and fashion in which your set up is placed.
Units
Heroes
Elites
- Golem
- Gargoyle
- Hellfire
Basic Strategy
The "Set Up"
The Units
Asmodeus' unique units work together in a formation called the "set up." Essentially, the tanks comprise the core of this set up, with Aza burrowed underneath or near them for their protection, Asmo and Sammy nearby to siege them (increase their range with Sammy's infernal siege ability) and protect them from air, Grigs to provide vision and detection, and your "meatshield" in front to act as a buffer if Heaven tries to attack. Understanding Asmo's set up is key to understanding his role in the game: essentially, he is supposed to provide cover fire for Dev pushes, secure gained ground, and slowly but safely push. Every unit he has works together beautifully to help him accomplish this.
The most common hotkey combination for the set up is
- Asmo and Sammy
- Aza
- Meatshield
- Tanks
- Ovies
- Gate to Hell
- Nydus
Asmo, occasionally along with Sammy, is sometimes put on the same hotkey as the Golems. This combination allows Asmo to more safely clear static, as the Golems tank damage for him. This does leave the tanks more exposed, so be careful. Obviously the exact details of your hotkey set up will differ, and you should find a combination that works best for you.
Asmodeus will primarily push with tanks. The tanks will be sieged a reasonably safe distance away usually not being able to inflict damage. That's where Sammy proves to be useful as his ability increases the range of the tanks and only with this extra range should your tanks be able to inflict damage. This is the safest way to ensure your tanks are out of danger, but still able to inflict damage.
There are two main ways Heaven will try to stop Asmo: poking and diving. Poking refers to short, quick, harassing movements by Heaven to do damage to Asmo's set up, slow it down, or snipe a tank. A dive refers to a longer, more protracted and committed movement where Heaven goes in to get kills. You are most vulnerable to pokes and dives when alone and when moving your tanks up, for they cannot move in attack/siege mode. A flank refers to a multi directional dive, and almost always involves multiple members of Heaven. This is the most serious, risky, and potent of all Heaven's assaults on Asmo and Hell in general, and requires good positioning, quick fingers, and excellent teamwork to repel. Generally, if Heaven successfully flanks you and loses nothing in return, there was an error with communication and teamwork on the part of Hell.
Your meatshield, i.e. your Golems and Gargoyles, are your prime deterrent to pokes and dives. Golems quite literally act as a shield to prevent units from getting in range of your tanks, and are very durable. They are quite like traditional immortals, hardy but with little damage. If you are not using them aggressively with Asmodeus proper, keep them in front of your tanks. Gargoyles, when landed, act like more damaging but far more fragile Golems (and should usually be behind Golems when grounded), but when in the air, can provide valuable vision and help with anti-air. While they cannot zone out Heaven's air by themselves, with the help of other anti-air units on Hell's side they can be a DPS boost critical to killing off heroes like Raph, Messi, and Nate. Of particular note, they are faster than Messi, and are extremely vulnerable to his Thor's AOE anti-air. Perhaps their most critical function is AOE DPS themselves: their bomb ability can level an entire army if its clumped up. While it takes an absentee player to allow Gargoyles to aggressively bomb them en masse, when Heaven is diving or flanking they have little options but to back off or take the hit. In this way, aerial Gargoyles are the ultimate protection for your tanks. Always keep an eye on your bomb count, however. If Heaven can bait them out of you, they do not recharge, and aerial Gargoyles with no bombs do little more than provide vision if Heaven is diving your set up.
Sammy and Asmo are almost always going to be together. One can use them together to clear static, as they have good single target damage and Asmo can see up high ground. While it might be tempting (and in some situations necessary) to clear static with a seiged Asmo, seiging Sammy instead levels their range and prevents pathing bugs where Sammy might unfortunately die. When not using the two actively, they should be positioned by the tanks (always on hold, to prevent Sammy from drawing aggro and dying) to deter Raph, Nathan, or Messi with their huge, combined amount of anti-air damage or destroy them if they dare to tread further over creep than they should. Take note that the range of their attacks can be increased and with that, their effectiveness in destroying heroes and units. Make sure you keep an eye on Sammy when sending him to heal for more siege energy, because a few Messis will keep very forward invis Preds in odd places to snipe him.
Hallucination is a criminally underused ability, often abandoned in favor of infernal siege. It does, however, have its uses. One can shift queue hallucinations on an enemy hero, most often Sera or Uri, to trap them with hallucinations. You can then focus fire them for an easy kill. When coordinating a kill with the rest of Hell, this makes it even easier. You can also use Hallucination to create fake tanks if you are dived, or one can mass Hallucinate fake Asmo's to block the path of a flanking army. Lastly, you can create Hallucinations of Sammy and then do some Dota-esque tricks to get them to aggro the illusion instead of the real Sammy, but this is extremely situational.
Azazel should never be used offensively (without DS), but he is quick on creep. He should always be placed slightly in front of your tanks with the Golems standing above him to prevent him from being easily spotted and focus fired on. Azazel's high line splash damage will chew ragged holes through Heaven's ranks if they attempt to dislodge the tanks from their position. One can also hide Aza directly under the tanks themselves, though his efficacy in a dive will be slightly diminished for ranged reasons because of this. Notably, he cannot be sieged with Sammy's infernal siege ability.
Moving Forward
When moving the set up forward, you can observe the following steps:
- Make sure the area you are moving to has vision/detection with Ovies and is Creeped.
- Mentally prepare yourselves and your fingers; speed is key.
- Unburrow Aza, and move him forward.
- Move meatshield over Aza, with Gargoyles manually behind the Golems so they aren't sniped by Nate or Messi
- Burrow Aza, and when this is done, unsiege Tanks.
- Move Tanks into position, and be mindful of pathing issues if near an active Nydus rally.
- Siege Tanks.
Strategy
Early Game
There are several different options available for Asmodeus in the early game, and they are most easily divided by the area which Asmodeus attacks. Each opening has its own pros and cons, and it is important to find the one that best fits your play style. Tailoring your opening to the context of the game is generally not as important as adjusting your strategy in later phases: generally, the only variable at the start of the game is who is playing each role. If a hero dies that could potentially alter which opening is most effective, it is likely too far after Asmodeus' initial opening to warrant a change.
Regardless of the opening you pick, there are a few things that must be done regardless. For example, the use of Asmo and Sammy together to clear tanks and other static defense on the high ground. Wherever Asmo decides to set up, it is his responsibility to clear static in that area. Another player, most likely Moloch or Dev, may do this for you, but the quickest and most sure way to get it done is to do it yourself. If Uri or Sera is contesting this, you can either get Dev to swing Beez over for a DS to zone them out, or you can do an impromptu set up yourself to force them off.
Additionally, it is imperative to begin Creeping right when the game starts. Creeping, a proper Nydus rally, and quickly setting up hotkeys are all fundamentals of HB that will give your game a critical boost. Creeping for Asmo is, regardless of the opening, generally done on the left side, as Dev and Asta will cover the rest of the map. For your Nydus rally, there are two different options: you can go directly up the left side lane, as seen in the picture below, or you can have it jut out to the left to deter Sera incursions into Hell. Generally, unless Sera is avoiding Hell altogether or you are doing a far left side set up like the one below, it is usually more convenient to just jut the Nydus rally out left. There is little downside for doing so.
Lastly, regardless of your opening, always look for Hero kills. Halluc traps and ganks with Asta are easy ways to get kills, especially on Uriel. If he or any other vulnerable Hero is too far forward, shift queue the Halluc trap with Sammy and Asmo on the same hotkey and focus fire. If they are looking away for even a second, or if its coordinated with Asta, that's a dead hero.
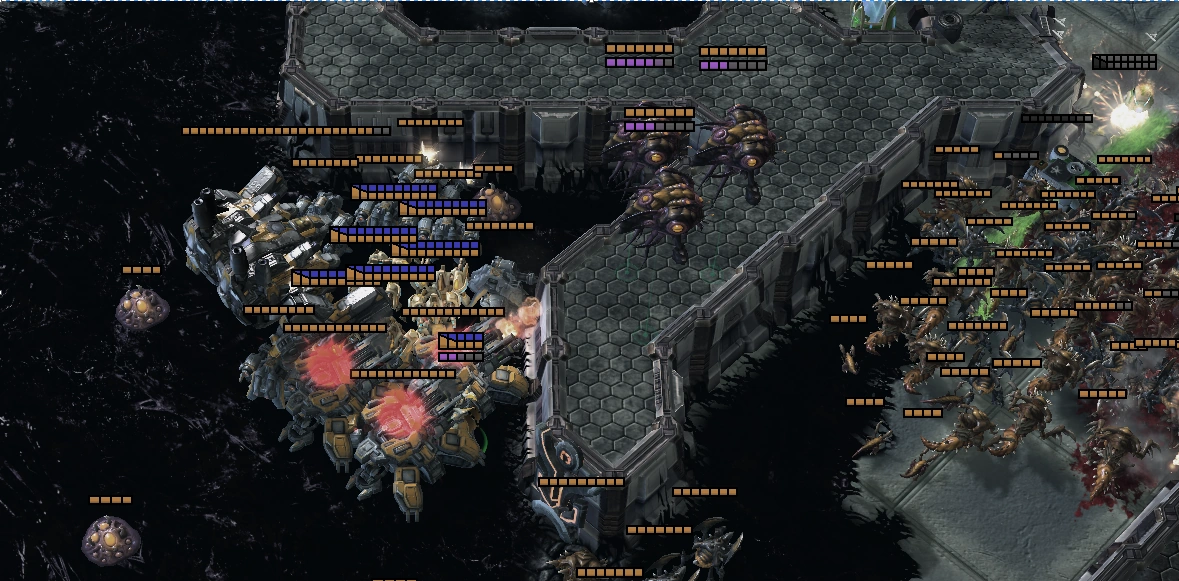
Placement for Asmodeus's Tanks in Early game
-Left Opening-
Left Side is generally seen as the quickest and most efficient opening. While some may argue it is theoretically possible to kill Gate quicker with the Mid opening, you will have cleared more and have your tanks in a more forward positioning going left, and can generally transition from the end of early game (gate going down) to the beginning of mid game (gate area completely cleared, beginning siege on Bene, Cita, and Enclave) quicker with the Left Opening. Additionally, this opening gives you the most opportunities to Halluc trap a hero.
As with every Asmodeus strategy in any phase of the game, there are always different micropositions available to the player. To list just a few, the Asmo player can:
-Set up in the nook between high ground on the far left side, as seen in the above picture.
-Go directly up the left side pathway to Gate. This is the not only the quintessential Left Opening, but is unarguably the most common opening period.
-To enable potential Bene Cheese, Asmo can set up directly north of his Nydus, right under the Pene.
-Mid Opening-
The Mid Opening is the safest way to siege Gate, and potentially the quickest in terms of getting Gate down: depending on how fast Dev cleared his static, you can immediately set up in range of Gate. Its main downside are the slow transition from Gate down to Gate cleared: a good Heaven will not immediately back to the mid game structures just because Gate died, and Asmo will not be able to zone them out from the Mid Opening position. This means an Asmo player going mid will have to spend a little extra time advancing in order to clear the same structures that would have been cleared earlier had he gone left. Additionally, it necessitates a leftward bend in your Nydus rally, and is susceptible to Sera incursions in to Hell and Zad sniping your Nydus. To prevent the latter, always have an eye on it, and keep an Ovie over your Nydus: if he lost energy getting into Hell in the first place, it can stall him at the Nydus long enough for you to walk Sammy or Asmo over.
The Mid Opening revolves around Tanks being placed underneath (but not in the way of his Nydus rally) Dev's opening into Gate. Generally, you will put them on the left side of the opening. There is no distinct advantage in being on the right side; it is virtually never done, and takes longer to set up. Initially, you can set up farther from the high ground, and then move up all the way to the Meatus of the Gate. If Dev has cleared the static and zoned Heaven back, you can set up more aggressively earlier. Notably, if Sera proper tries to snipe you from the high ground connecting the middle opening to the left opening, you can potentially Halluc trap her from the low ground, or coordinate a gank on her with Asta.
Your main concerns with the Mid Opening, aside from Zad and Sera excursions, are Messi harassing, which will almost require a perma sieged Asmo now, and poking attempts at your Tanks. Generally, Sera's stalkers and Uri's reapers will be the main culprits. Unless you set up too far forward when Heaven wasn't zoned out, or unless your set up is deficient, it will be difficult for poking attempts to be successful with this opening. Dev can always do an emergency DS if a poking attempt looks like it will result in damage, or if you are dived. Generally, a successful dive this early in this safe a position means you screwed up. Moloch can also accompany your set up to heal/invis any Tanks targeted in a poke.
Transitioning from the Mid Opening to the mid game necessitates clearing all the static from Gate and zoning Heaven back. Regardless of how you do this, and you will be hearing this a lot, it must be said that Creeping is vital. For Asmodeus, progress is made by advancing your set up forward. This is more difficult to do when transitioning from the Mid opening because it involves you going through Dev's opening to gate, which, because of his Nydus rally, will be a bit of a clusterfuck. You are always vulnerable when moving your set up forward, and dealing with pathing cluster exacerbates this problem. Picking a safe opportunity to move up through the opening, generally when Heaven is zoned off, is the quickest option. In this scenario, you will be moving your set up to the position directly northwest of the middle opening, southwest/west of the now dead Gate.
Alternatively, you can move around and go up the left opening. This way is longer and probably less Creeped, but less of a hassle. If you cleared the static here with Asmo and Sammy, or if Dev or Moloch or Asta swung this way, it can be almost as quick as moving up mid. If Sera or Uri contests this, however, your transition will resemble the traditional Left Opening until you have moved your Nydus up or they are zoned back.
Finally, a Vasco Nydus is a potentially valid strat under the Mid Opening. To do this correctly, place the Nydus in its traditional mid game position and either siege tanks in the standard Mid Opening set up, or move them to the left to better protect it. This can speed up your transition by quickly zoning Heaven away, or, if your ballsy enough, you can do it before Gate is down.
-Right Side/Cheese-
Setting up on the right side is almost invariably cheese. If someone [Rai] wants to expand this section, please do so. To intermediate/beginner level players, never do this, and recognize it as nonstandard.
Mid Game
The mid game is generally the lengthiest segment of the game, and more often then not determines who wins. As such, this is probably the most important section of this guide.
The standard mid game Nydus for Asmo is either on the low ground next to the other Nyduses where Gate was, or on the high ground between the mid Gate opening and the left Gate opening. Remember, proper Nydus rallying and Creeping is essential at all stages in the game. Of particular note is ensuring that your creep covers the "clover" structures between Gate and the mid game objectives. These are high ground areas, and if you do not have creep over them, you can potentially lose out on vital vision, the lack of which can enable successful Heaven pokes.
-Traditional-
The traditional Asmo strategy for the mid game is to go left to attack Bene. Because of the shitton of different micro positions that are available, this is going to take a lot of pictures and diagrams.
-Mid Asmo-
Mid Asmo is a strategy that has been gaining popularity recently, and is my personal favorite. This strategy involves following Dev down the middle to assault the Citadel, then transitioning left to assault Bene. The main benefit for this strategy is safety: it is harder to harass and poke, and virtually impossible to dive. Dev is always right there to help you with an emergency DS, your Ovies are generally stacked for invis detection, and your close proximity to Dev allows the full synergy between your two armies to shine. He can hide bane bombs under your set up, counter any dives with full melee, pounce on a wounded Messi with a sieged Dev, and so on. You, in turn, allow him to get away with more aggressive DS attacks and Devil harasses. Additionally, Asta will often swing Mid as well, enabling the full trio to go to work. Your close proximity to his Fallen and Forgotten can also save you, or at least allow a trade, if you are dived and Dev falters. Notably, this strategy is also the quickest way to get Cita down, robbing Heaven of reinforcements.
The main flowchart for Mid Asmo starts with the transition set up that you created after Gate was cleared. Move your tanks underneath the left side clover, similar to how you would assault Gate with a Mid Opening, for the first move. Unless Dev immediately zoned Heaven back onto the high ground near Cita, this position is usually necessary to gain control over the clover and successfully Creep it. After you have the clover cleared and Creeped, you can begin moving to the first real position in the Mid Asmo strat: directly north of your current set up, hugging the clover on the exact opposite side. While you can probably move Aza there right away, moving the entire set up will require Dev to either zone Heaven (at this stage mostly Messi) back into Cita, or will require a potentially risky clover set up. Once you have moved the set up forward, you can begin inching it forward to attack Cita. Notably, the tank on the lowest of the high ground between Cita and Bene, directly north of the clover, will be your biggest enemy in the entire game. This tank and the one directly above it are the two most important static defenses Heaven has. Implore Asta, Moloch, or Dev to clear it for you, or move Sammy and Asmo there yourself.